Intro
Today I’m going to be looking at the Rockit Cool copper IHS replacement for my 8700k. It’s an inexpensive little part that really just seemed worth it as a fun cosmetic project that could have some cooling performance gain. Since I already delidded my CPU twice this should be a piece of cake. Before we get to that, let’s run some baseline tests for comparison.
Specifications
- 5.1GHz Core Clock
- 4.0GHz Cache Clock
- 1.425v Vcore
- Turbo Load Line Calibration
- 0.950v Vccio
- 1.050v System Agent
- 1.020 Vccs Abstained
- 1.250v VccPLL OC
- 1.020 VccPLL
- Speed Shift & C1E, C3, C6, C7, C8 and C10 & Ring-To-Core offset (downbin) & Race To Halt & EIST & Energy Efficient Turbo & Voltage Optimization are disabled
- Package C States limited to C0/C1
Testing
I’m going to be using HWINFO64 to log and monitor and for the actual tests I’ve decided to use:
- Prime95 SmallFFT & LargeFFT for 10min
- Asus RealBench stress test 16GB for 15min
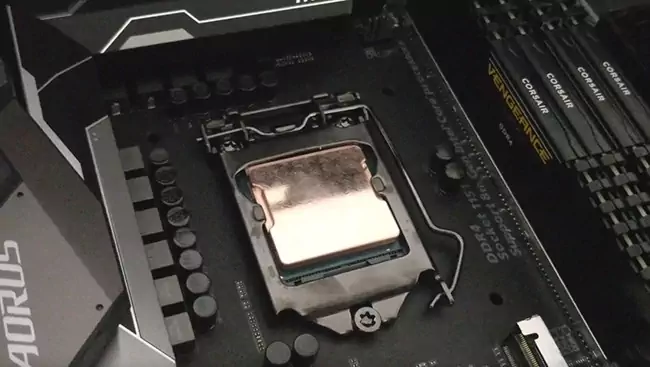
Installation
Once the testing is finished I’ll remove the Intel IHS and clean the liquid metal off the CPU die. I’ll also clean the copper IHS with rubbing alcohol. I’ll apply a layer of liquid metal to the CPU die and press fit the new IHS and then pull it back off to observe where I should apply the liquid metal to on the copper spreader. Then I’ll dab around a layer of liquid metal to the lid. Carefully I’ll put the CPU in the socket without sealing the lid, using only the force of the socket and heatsink to keep it held in place. Dab some Kryonaut onto the lid, install my heatsink and then we’re done and I can begin the after testing.
Results
Let’s get the hardcore test out of the way first, but the more tame of the two.
Prime95 LargeFFT
Before
During this test CPU temperatures ranged from 30c to 80c with an average of 65c. The VRM temperatures ranged from 46c to 85c with an average of 74c. It took until time unit 249 for CPU to reach MAX TEMP.
After
During this test CPU temperatures ranged from 31c to 79c with an average of 64c. The VRM temperatures ranged from 28c to 84c with an average of 52c. It took until time unit 332 for CPU to reach MAX TEMP. Note that during this test the sensor and fan controller chip bugged out which slightly invalidates voltage and VRM readings.
Prime95 SmallFFT
Before
During this test CPU temperatures ranged from 30c to 90c with an average of 76c. The VRM temperatures ranged from 51c to 97c with an average of 82c. It took until time unit 52 for CPU to reach MAX TEMP. Note that during this test the sensor and fan controller chip bugged out which slightly invalidates voltage and VRM readings & I decided to stop it early.
After
During this test CPU temperatures ranged from 30c to 90c with an average of 78c. The VRM temperatures ranged from 48c to 106c with an average of 94c. It took until time unit 107 for CPU to reach MAX TEMP.
Asus RealBench
Before
During this test CPU temperatures ranged from 34c to 81c with an average of 72c. The VRM temperatures ranged from 47c to 76c with an average of 72c. It took until time unit 614 for CPU to reach MAX TEMP.
After
During this test CPU temperatures ranged from 30c to 80c with an average of 69c. The VRM temperatures ranged from 38c to 77c with an average of 71c. It took until time unit 441 for CPU to reach MAX TEMP.
Thoughts & Conclusion
Well, if you were thinking of buying this in hopes of getting amazing temperatures you’ll be sorely disappointed. The most you’ll get is a degree or two. One thing you totally will get is a longer heat soaking time. So those transient high load situations won’t reach peak as quickly. I’m going to be leaving mine on, I love how it looks even though I can’t see it during normal operation. There is a bit a placebo on me where for whatever reason I feel more comfortable using this then just sticking the stock IHS back on. Part of that is this being my 3rd time installing the liquid metal. I got my technique down and everything. My next upgrade should be a bare copper NH-D15 sized cooler at this point. Copper rules everything around me.